Installation and System Requirements
This guide covers the installation process, system requirements, and upgrade procedures for VidRedi.
System Requirements
Operating System
VidRedi is designed specifically for Debian Trixie (Debian 13). While it may work on other Linux distributions, it has been optimized and tested for Debian Trixie.
Hardware Requirements
CPU and GPU
- CPU: Intel CPUs, preferably 10th-gen or later
- GPU: Integrated GPU or Intel ARC
- Recommended: Multi-core processor for handling multiple simultaneous channels
- Consider CPU performance based on the number of channels you plan to run
Capture Hardware
VidRedi DVR requires a Blackmagic DeckLink capture device:
- Recommended models:
- Blackmagic DeckLink Duo 2
- Blackmagic DeckLink Quad 2
- These models provide multiple input/output channels in a single card
Memory
- Minimum: 8GB RAM
- Recommended: 16GB+ RAM for multi-channel setups
Storage
- Fast storage (SSD/NVMe) recommended for recording channels
- Storage capacity depends on:
- Number of simultaneous recordings
- Video quality/bitrate
- Retention requirements
It is highly recommended that the data storage drive be separate from the operating system disk. The way the data storage is setup is completely up to you, with NVMe being used as the storage medium.
Software Dependencies
VidRedi requires several dependency packages that will be installed and configured during setup. The following are not installed from the main Debian repository:
- GStreamer – We use a custom build that contain a few patches, along with the Rust plugins. This Debian package is downloaded and installed from VidRedi.
- Node.js runtime – Version 22 is installed from Node Source Debian packages.
- Blackmagic Decklink Drivers – These must be manually installed. If you have a local download of the drivers, you can use the easy install script for the drivers using
scripts/install-decklink.shindependently of the main installer.
Installation
Prerequisites
There are two paths you can take to install Debian Trixie – automated or manual. For support purposes, we recommend the automated method, but you are welcome to manually configure Debian for your environment.
The login you choose for your system can be anything, but do not use vidredi as it is reserved for the software during setup.
-
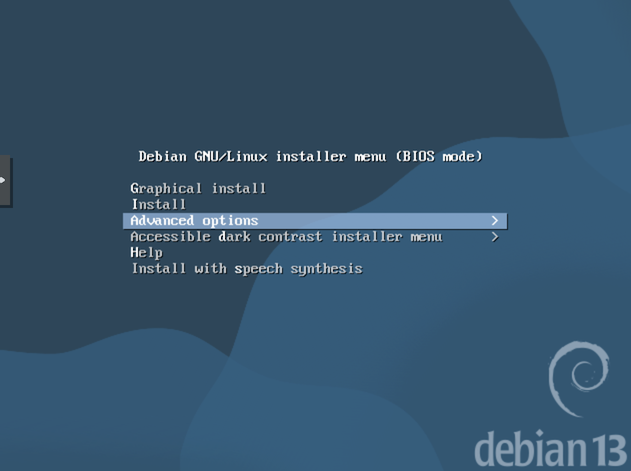
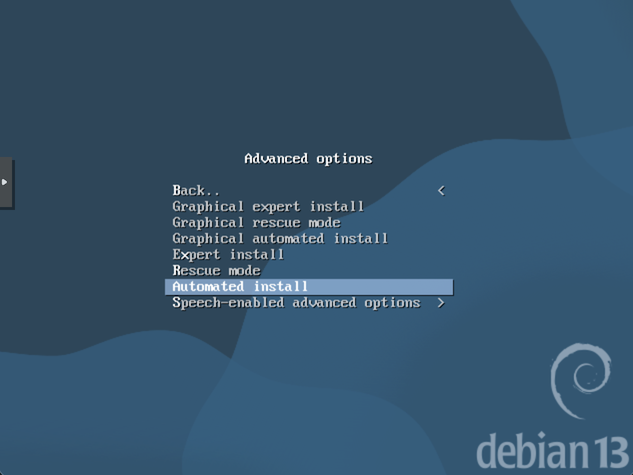
Boot the ISO and, once at the main prompt, go to Advanced Options... > Automated Install
-
If asked, select OK on the NIC that is enabled (dual NIC systems).
-
When prompted for the automation pre-configuration (preseed) file URL, enter the appropriate URL for your environment (VidRedi default is
https://download.vidredi.com/seed.cfg).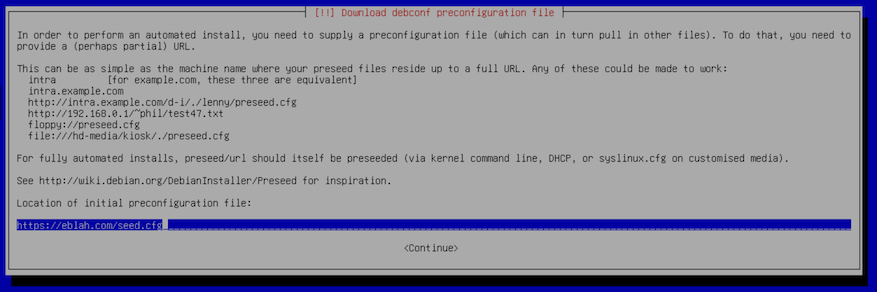 info
infoEach section of the recommended seed.cfg file is documented with what it is doing. It's always good practice to verify scripts before they run.
-
You'll be asked some setup questions about logins for your system. Remember these for later.
-
On the disk setup page, it is recommended to use two separate disks.
- OS disk: this is where
/will be installed. You're free to partition this how you see fit; however, verify that/optand/varhave enough storage for the application and log files. For most, it would be simplest to choose "Automatically partition the free space" on this disk which will create a/and swap partition automatically. - Data disk: The secondary disk should be set aside for your content. For the easiest install, use
/var/lib/vidredi. This will store all videos, configurations, and database for your system. It must be large enough to store your video database.
It is recommended the partitioning look similar to this:
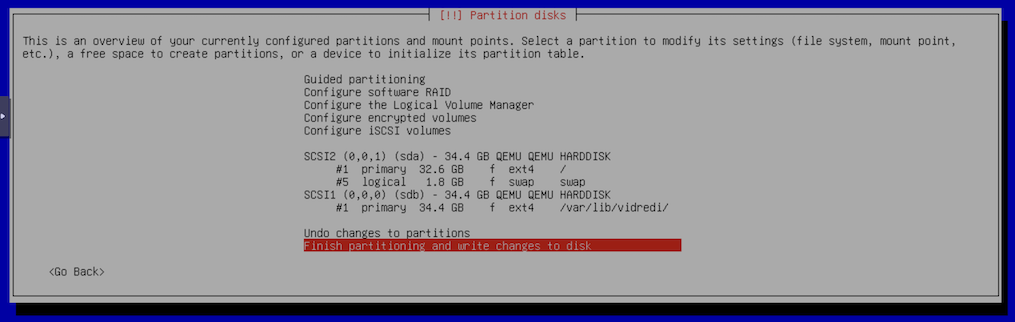 Advanced Users
You are welcome to change these partition maps and types based on your use case.
- OS disk: this is where
-
Debian should install and reboot to the login prompt. Once logged in, continue with the setup.
After installation, you can choose to move on to using SSH for connecting to your server. Note that you'll need a root account or sudo access. This guide will not cover security implications on those methods and expects the owner to know the basics for such actions beforehand. It is recommended to use sudo for root access.
If you choose to not use SSH, you can use the root login configured in the previous step on a physically connected terminal. For support purposes, you'll need a remote terminial with root or sudo access.
Software Installation Steps
There are several methods to get the VidRedi software, but each requires running scripts/install.sh.
The first time installation requires the download and installation of third part packages, which are around 1GB.
In addition, the Decklink driver installation is typically around 1.5GB.
A restricted user, vidredi, will be created during setup. It should not be used for login and should only be used by the software.
-
Change your current server name,
sudo hostnamectl set-hostname vidredi-server-name. -
Download and extract the package:
curl -fsSL "replaceWithUrlGiven" -o ./dvr-full-install.tar.gz
mkdir dvr-full-install
tar -xvzf dvr-full-install.tar.gz -C dvr-full-install --strip-components=1
cd dvr-full-install -
Run the setup script:
./scripts/install.sh --offlineInstalling Decklink DriversYou can also install or upgrade the Blackmagic DeckLink drivers at any time without running the full installer by using the standalone script:
sudo ./scripts/install-decklink.sh <drive-package-url> # This should be version 14.4.1
Verifying Installation
After installation:
-
Access the web interface from another computer at
http://remote-ip -
The default login for VidRedi is
admin/admin12345. It is recommended to change this after installation. -
Review Authentication and User Management for first login, password changes, and user access setup.
VidRedi is not designed for outside Internet access (open ports). For security purposes, no port should be opened allowing access to it via the Internet.
There is one exception, and that is when running a channel as an SRT listener (where a remote must call to the IP:PORT). In these situations, only expose this port to UDP traffic.
VidRedi has been tested with Tailscale. If access is needed offsite, or streaming access is needed, a great alternative to exposing the server to the Internet is using Tailscale or another Wireguard-based VPN.
Configuration and Environment
Environment Variables
VidRedi uses a service environment file located at /opt/vidredi/service.env. This file is used by the systemd service and contains important configuration variables:
Key Environment Variables:
VIDREDI_PATH_CONFIG: Path to the main configuration file, by default/opt/vidredi/config.jsonNODE_ENV: Environment to use (by defaultproduction)
We do not recommend changing these unless you are an advanced user.
Data Storage Location
VidRedi stores all recordings and data at /var/lib/vidredi.
Recommended Setup:
For production systems, as recommended in the installation section, it's highly recommended to use a secondary disk mounted at /var/lib/vidredi:
-
Benefits:
- Separates system and data storage
- Prevents recordings from filling the system partition
- Easier to manage storage capacity
- Simplifies backup procedures
-
Setup:
- Mount a dedicated disk to
/var/lib/vidredibefore installation - Ensure the mount is configured in
/etc/fstabfor persistence - Verify permissions allow the
vidrediuser to write to the location
- Mount a dedicated disk to
Upgrading VidRedi
To upgrade an existing installation, repeat the setup process. The setup script will install the latest version.
While the upgrade process takes precautions to prevent data loss, it's always recommended to keep good backups of the data partition (/var/lib/vidredi).
During an upgrade, the new version is installed to /opt/vidredi/current. A backup is made of the old version running software (/opt/vidredi/current.backup). Data is not backed up during upgrades.
Upgrade Considerations
- Review release notes for breaking changes
- Test in a non-production environment first, when possible
- Ensure adequate disk space for the upgrade process
VidRedi installation on unlicensed hardware is allowed for testing purposes without fully licensing, for those with another licensed device. For unlicensed hardware, video playback and recording are disabled.
Post-Installation
After successful installation:
- Configure your first channel (see Getting Started)
- Configure backup procedures for your recordings
Troubleshooting Installation
DeckLink Card Not Detected
If your Blackmagic DeckLink card is not detected:
- Verify the card is properly seated in the PCIe slot
- Check that Blackmagic Desktop Video drivers are installed
- Run
lspci | grep Blackmagicto verify the card is visible to the system - Verify the card firmware is up to date:
The hardware can be updated by:
BlackmagicFirmwareUpdater statusBlackmagicFirmwareUpdater update 1
BlackmagicFirmwareUpdater update 2
BlackmagicFirmwareUpdater update 3
BlackmagicFirmwareUpdater update 4 - See the Troubleshooting guide for more details
General Installation Failures
- Check the installation log (
/var/log/vidredi/installation.log). - Email support if problems persist.
Permission Issues
If you encounter permission issues:
- Ensure proper user permissions for the installation directory
- Check file ownership and permissions
- Some operations may require appropriate system privileges
- Rerunning the installation script (even if the same version) should reset all permissions.